Performing a regular home roof inspection is essential to maintaining the structural integrity of your home and preventing costly long-term problems. Whether you’re an experienced homeowner or someone who has just purchased a property, having a regular roof inspection can help you identify any problems early and take preventive measures. In this step-by-step guide, we’ll explore how to conduct an effective roof inspection, giving you the tools and knowledge necessary to keep your home in optimal condition.
Step 1: Gather the Necessary Tools Roof Inspection
Before beginning the inspection, it is crucial to have the right tools. You’ll need a safe ladder to access the roof, binoculars to examine inaccessible areas, and a flashlight to illuminate dark places, especially in the attic. Also, have a tape measure handy to measure any damage or affected areas.
Step 2: Perform a Visual Inspection from the Ground
Begin your roof inspection from the ground, noting any visual anomalies. Look for damaged, displaced, or missing shingles or roofing materials. Examine areas where shingles overlap, as these are prone to problems. Pay attention to any changes in color that could indicate water damage.
Step 3: Examine the Attic or Crawl Space
If possible, access the attic or crawlspace to examine the underside of the roof. Look for water stains, mold, or any signs of leaks. The presence of stains on the insulation or wood may indicate leak problems that should be addressed immediately.
Step 4: Inspect Gutters and Storm Drains
Gutters and storm drains play a crucial role in protecting your roof from pooled water. Examine gutters for obstructions, such as leaves and debris, that could prevent proper water flow. Make sure storm drains are in good condition and that water moves away from the foundation of the house.
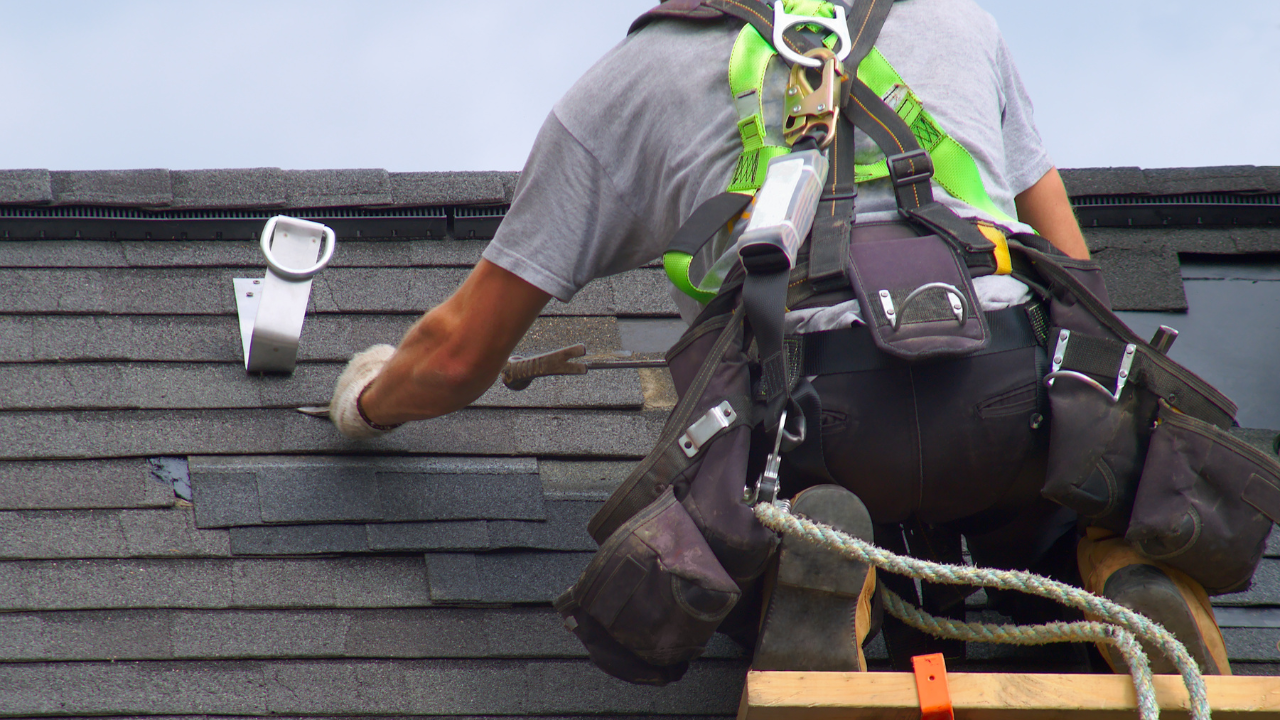
Step 5: Check the Sealing Around Chimneys and Roof Windows
Chimneys and roof windows are areas prone to leaks if they are not sealed properly. Examine the sealing around these openings to make sure it is in good condition. Look for cracks, separations, or any signs of wear that could allow water to enter through these vulnerable spots.
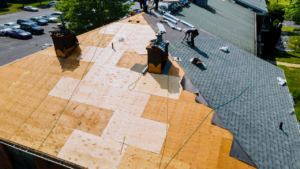
Step 6: Evaluate the Condition of the Shingles or Roofing Materials
Shingles or roofing materials are the first line of defense against the elements. Inspect each shingle individually for cracks, chips or deformities. Check for loose or missing shingles. Also, pay attention to the presence of debris or moss, as this may indicate drainage or moisture problems.
Step 7: Examine Areas Around Roof Openings
Areas around roof openings, such as chimneys, roof windows, and vents, are prone to problems. Inspect these areas for caulking damage, loose shingles, or structural problems. Make sure openings are properly sealed and protected.
Step 8: Pay Attention to Signs of Wind or Hail Damage
In storm-prone areas, wind and hail can cause significant roof damage. Examine the shingles for signs of impact or deformity that may have been caused by extreme weather events. Pay attention to areas where hail may have left dents or cracks.
Step 9: Check the Condition of the Joints and Connections
Joints and connections in the roof, such as areas where different sections of shingles or roofing materials meet, are prone to problems. Check that these areas are sealed properly and that there are no signs of separation or wear. Faulty joints and connections can be vulnerable points for leaks.
Step 10: Inspect Support Structures from the Attic
If possible, examine the support structures from the attic. Look for signs of deformity, mold, or structural damage. Pay special attention to the areas where the roof meets the walls, as problems in these areas may indicate deeper problems in the structure of your home.
Step 11: Document and Take Detailed Notes
As you conduct your inspection, document and make detailed notes of any problems you find. This will be helpful when discussing results with a professional or addressing problems on your own. Having a clear record will allow you to track the condition of your roof over time and take preventive measures when necessary.
Step 12: Consider Consulting a Roofing Professional
If you find problems during the inspection or if you don’t feel confident performing certain evaluations, consider consulting a roofing professional. Experts have the experience and knowledge to identify specific problems and offer detailed recommendations for proper repair or maintenance.
Conclusion: Keep Your Roof in Optimal Condition with Regular Inspections
Performing an at-home roof inspection is not only a key task in maintaining the structural integrity of your home, but it is also a smart preventive measure to avoid costly repairs in the long run. By following this step-by-step guide, you will be equipped with the tools and knowledge necessary to carry out.
Click Global, a leading digital marketing company, to provide expert guidance on how to promote and expand your business.